


Introduction
Have you ever wondered how people bake bread without using yeast from a packet? The answer is sourdough starter. It’s a natural mixture of flour and water that captures wild yeast from the air.
A sourdough starter is like a living thing. You “feed” it with flour and water daily, and it grows stronger. Once it’s ready, you can use it again and again—like a pet for your kitchen! In this guide, we’ll walk you through everything you need to know: from the ingredients to how to make and care for your starter, plus some common questions.
Ingredients – Sourdough Starter
You only need two simple ingredients to create a sourdough starter:
- Flour – You can use all-purpose flour, whole wheat flour, or rye flour. Organic is better if you can get it.
- Water – Use room temperature, filtered water if possible. Tap water works too, but let it sit out for a few hours to remove chlorine.
That’s it!
No sugar, no yeast, no milk—just flour and water. The wild yeast and bacteria from the air and flour will do all the work.


Step by Step Process – Sourdough Starter
Here’s a simple, day-by-day breakdown for making your own sourdough starter from scratch:
Day 1: Start the Starter
- Mix ½ cup of flour and ¼ cup of water in a glass jar or plastic container.
- Stir well until smooth.
- Cover loosely with a lid or cloth (not airtight).
- Let it sit at room temperature for 24 hours.
Day 2: Feed the Starter
- Check for bubbles or a slight smell. Don’t worry if there’s no change yet.
- Remove half of the starter and throw it away (this is called discarding).
- Add ½ cup of fresh flour and ¼ cup of water to the remaining starter.
- Mix well and cover loosely again.
- Leave it out for another 24 hours.
Day 3: Repeat
- You might see some bubbles now. That’s a good sign!
- Discard half of the starter.
- Add ½ cup flour and ¼ cup water again.
- Mix, cover, and let it rest.
Days 4 to 7: Keep Feeding
- Keep doing the same thing every day:
- Discard half.
- Add fresh flour and water.
- Mix and rest.
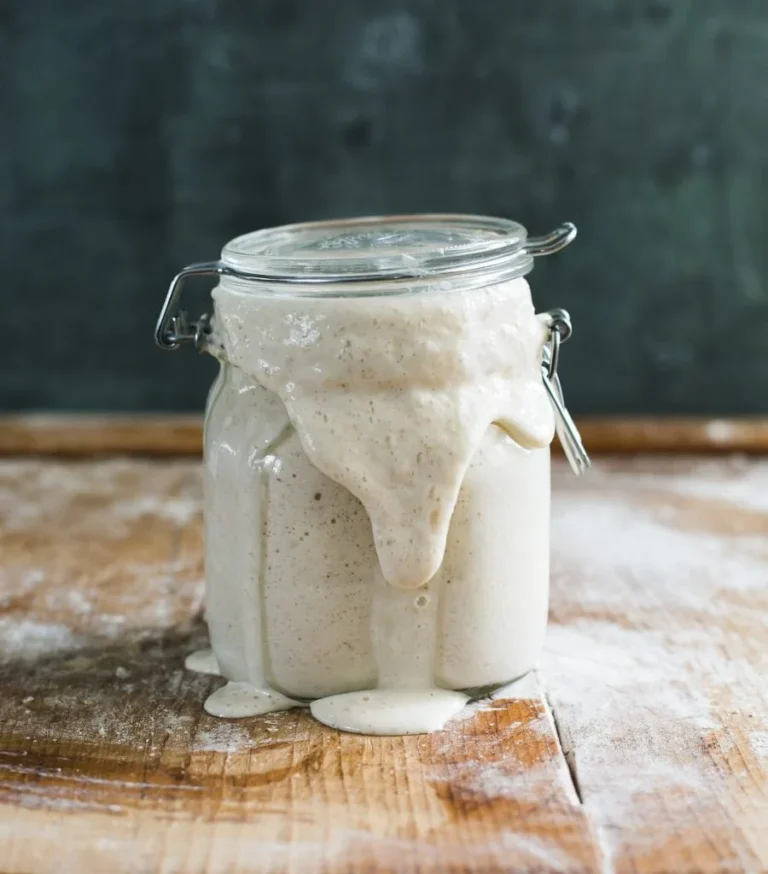
By day 5 or 6, your starter should be bubbly, have a tangy smell (like yogurt or vinegar), and double in size within 6–8 hours of feeding. That means it’s almost ready to use!
How to Know It’s Ready
Your starter is ready when:
- It doubles in size after a feeding.
- It’s full of bubbles.
- It has a pleasant, slightly sour smell.
Nutritional Information
| Nutrient | Amount |
|---|---|
| Calories | 25 |
| Carbohydrates | 5g |
| Protein | 1g |
| Fat | 0g |
| Fiber | 0.5g |
| Sugar | 0g |
| Sodium | 0mg |


Frequently Asked Questions
Q1: Why do I need to throw away part of the starter every day?
Great question! Throwing away half of it helps keep the right balance of flour and water. If you don’t, your starter will grow too large and not be as healthy.
Q2: Can I use whole wheat or rye flour instead of white flour?
Yes! In fact, many people say whole wheat and rye flour help the starter grow faster in the beginning because they have more nutrients.
Q3: My starter smells weird. Is it bad?
A slightly sour or vinegary smell is normal. But if it smells rotten, like mold or has pink/orange spots—throw it out and start over.
Q4: How do I store my starter after it’s ready?
Once your starter is mature, you don’t need to feed it every day. You can keep it in the fridge and feed it once a week.
Q5: What can I do with the “discard”?
Don’t toss it away! You can use the discard to make pancakes, waffles, pizza dough, muffins, and more.
Final Thoughts
Making your own sourdough starter is easy, fun, and kind of magical. With just flour, water, and a little time, you create something alive that helps bake amazing bread.
The best part? You don’t need any fancy equipment. And once your starter is active, you can keep it going forever—just feed it regularly.


